The good news is that if your provider supports forwarding (most do), you can connect it to Jelly.
Forwarding tells your email provider to send a copy of every incoming email to Jelly. The exact steps vary by provider, but the general approach is the same everywhere.
Find Your Jelly Forwarding Address
First, you need to know where to forward emails to.
- Open Jelly
- Click your profile photo in the top-right corner
- Select Email Setup
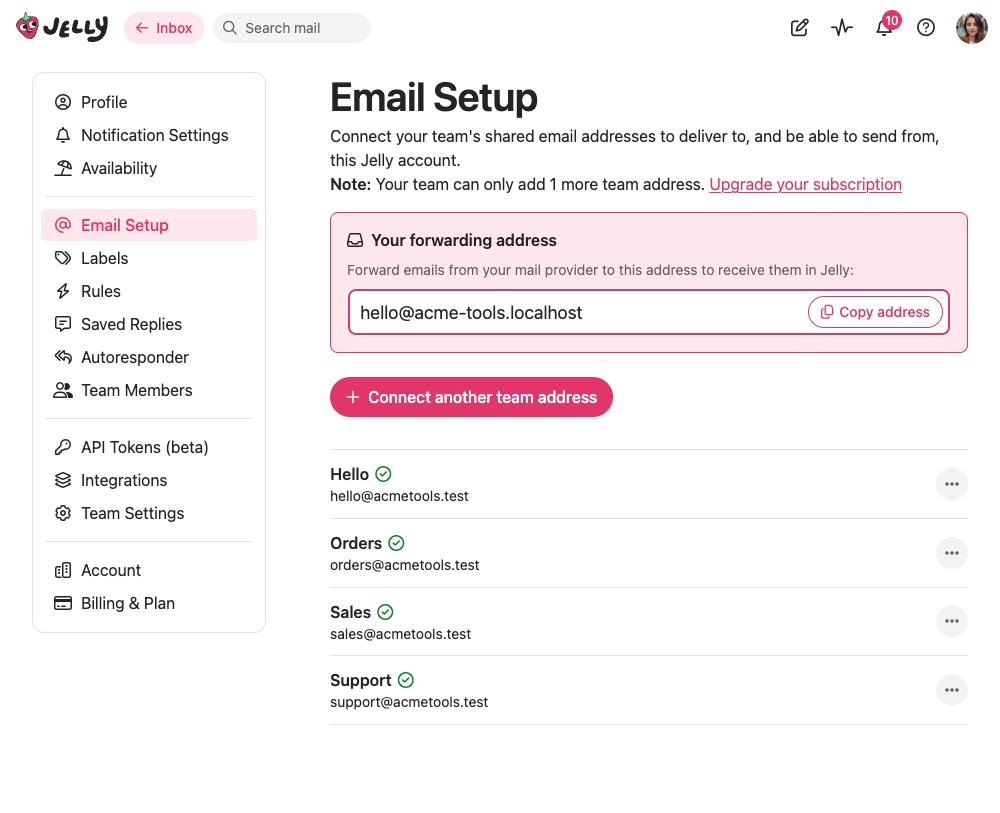
- Copy the forwarding address
- You’ll see your forwarding address:
hello@your-team.sendtojelly.com - Copy this address — you’ll need it in a moment
- You’ll see your forwarding address:
The General Approach
Most email providers have a forwarding option somewhere in their settings. You’re looking for something that automatically sends copies of incoming mail to another address. Here’s what to look for:
- A “Forwarding” section in settings
- “Mail rules” or “Filters” that can forward messages
- “Auto-forward” options
- “Email routing” settings
The key is to set up forwarding that:
- Applies to all incoming mail (not just specific senders or subjects)
- Keeps a copy in your original inbox (recommended, for backup)
- Forwards the original message, not a wrapped/quoted version
Provider-Specific Guidance
Here’s how forwarding works in some common email providers. If yours isn’t listed, the general approach should still apply — look for forwarding or filter options in your settings.
Fastmail
Fastmail has excellent forwarding support.
- Go to Settings → Filters & Rules
- Click Create a new rule
- Leave the conditions empty (or set “All messages”)
- Under actions, choose Send a copy to and enter your Jelly address
- Save the rule
Zoho Mail
- Go to Settings (gear icon) → Mail → Email forwarding
- Click Add email address
- Enter your Jelly forwarding address
- Zoho will send a verification email — check your Jelly inbox and click the link
- Once verified, enable forwarding and choose to keep a copy
ProtonMail
ProtonMail forwarding requires a paid plan (not available on free accounts).
- Go to Settings → Forwarding
- Click Add forwarding address
- Enter your Jelly forwarding address
- ProtonMail will send a verification — check Jelly and confirm
- Go to Filters and create a filter that forwards all mail
!> ProtonMail emails that are forwarded lose their encryption since Jelly isn’t a ProtonMail recipient.
iCloud Mail
- Go to iCloud.com → Mail → Settings (gear icon)
- Click Forwarding
- Enter your Jelly forwarding address
- Choose whether to keep copies in iCloud
cPanel / Webmail (Hosting Providers)
If your email is hosted through a web hosting provider, you’ll usually find forwarding in cPanel:
- Log into cPanel
- Look for Forwarders in the Email section
- Click Add Forwarder
- Enter the email address to forward from
- Enter your Jelly address as the destination
You can usually choose to keep a copy
Custom Mail Servers (Postfix, Sendmail, etc.)
If you run your own mail server, you’ll configure forwarding through your MTA configuration or mail aliases. The specifics depend on your setup. The goal is to add an alias or forwarding rule that sends copies to your Jelly address.
Test That Forwarding Works
Before moving on to the sending setup, verify that forwarding is working:
- Send a test email Send a test email to your address from a different email account
- Wait and check Wait a few seconds
- Check Jelly — the email should appear in your inbox
If it doesn’t arrive:
- Check Jelly’s spam folder
- Verify the forwarding address is correct
- Make sure you saved your forwarding settings
- Check if your provider requires a confirmation step you might have missed
Next: Set up sending
Now that you have your incoming emails flowing from your email account into Jelly, let’s configure Jelly to be able to send replies using your email address: