How Rules Work
Rules are “if-then” statements that run automatically on every incoming message:
IF [condition is met] THEN [perform this action]
For example:
IF the email is from support@bigclient.com THEN assign it to Sarah and add the “Priority” label
Each rule has one condition and one or more actions. All active rules are checked against every incoming message, and every rule that matches will run — there’s no “first match wins” behaviour.
Creating Rules
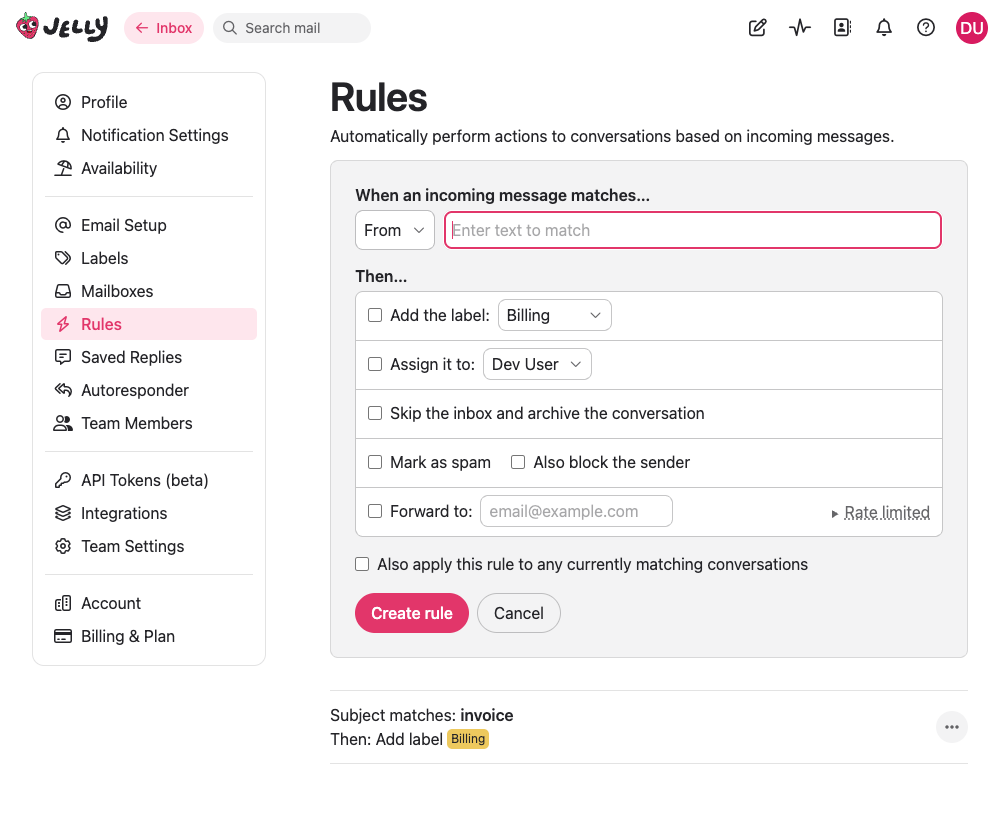
Go to Settings → Rules and click Create a new rule.
Only admins and team owners can create, edit, and delete rules.
Conditions
Choose what to match on:
| Condition | Matches against |
|---|---|
| From address | The sender’s email address |
| To address | The recipient address |
| CC/BCC address | The CC or BCC addresses |
| Any address | All of the above |
| Forwarding address | The specific forwarding address the email was sent to |
| Subject contains | The email subject line |
| Body contains | The email body text |
| Anywhere | Subject, body, and all addresses |
Matching is case-insensitive and uses contains logic — if your criteria value appears anywhere in the field, the rule matches. For example, a rule matching “invoice” in the subject will match “Your Invoice #1234”, “INVOICE attached”, and “Re: invoice question”.
Need more power? Advanced Rules let you combine multiple conditions with AND/OR logic and use regular expressions for precise pattern matching. Available on the Royal Jelly plan.
Actions
You can combine multiple actions on a single rule:
- Add a label — Applies a label to the conversation
If anyone in your team is auto-following that label, they’ll automatically be subscribed to the conversation too.
- Assign to a person — Assigns the conversation to a specific team member
- Skip the inbox and archive — Archives the conversation immediately
This is useful for messages you want to be able to find, but that don’t require any action — receipts, confirmations, automated notifications, and things like that.
- Mark as spam — Marks the conversation as spam, with an optional sub-action to also block the sender
When blocking a sender, contacts marked as “never spam” will not be blocked.
- Forward to an email address — Sends the original message as-is to the specified address, preserving the body and attachments
The forwarded email is sent from your team’s sending address, with the original sender set as the Reply-To so that replies go back to the right person. This is useful for routing certain messages to external systems, other teams, or personal inboxes. Forwarding is rate-limited to 25 messages per hour per destination address.
Applying Rules Retroactively
When you create a new rule, you can tick the option to apply it to existing conversations. This runs the rule against all your existing messages in the background, which is useful if you’re setting up rules after you’ve already received some mail.
The forward action is skipped when applying rules retroactively, to avoid sending a large number of forwarded messages at once.
Examples
Here are some common rule setups:
Route billing emails to the right person:
- Condition: To address contains
billing@ - Actions: Add “Billing” label, Assign to Alex
Auto-archive receipts:
- Condition: From address contains
noreply@ - Actions: Skip the inbox and archive
Flag VIP customers:
- Condition: From address contains
@bigclient.com - Actions: Add “VIP” label
Block persistent spam:
- Condition: From address contains
spammer@example.com - Actions: Mark as spam, Block sender
Route by forwarding address:
- Condition: Forwarding address is
support@yourteam.sendtojelly.com - Actions: Add “Support” label
Forward to an external system:
- Condition: Subject contains
[ticket] - Actions: Forward to
tickets@helpdesk.example.com
Plus-tagged addresses are a powerful way to use forwarding address rules. Your forwarding address accepts emails with a +tag appended to the local part — for example, hello+billing@yourteam.sendtojelly.com will be delivered to the same inbox as hello@yourteam.sendtojelly.com. You can give different plus-tagged addresses to different services, then use forwarding address rules to automatically label or route conversations based on which tagged address received the email.